Like any IT project, you've been told about the value you'll derive from implementing digital solutions. Computer vision projects are no exception. But because of implementation challenges, companies are sometimes slow to realize this value. Such challenges can include problems integrating the solution into a broader technological environment, lack of team training, underestimated change management support, or insufficient resources.
Drawing on the lessons learned from numerous projects deployed over the last few years, Deepomatic offers advice on how to generate the data and information essential to your field operations, and maximize the value of your computer vision project. From creating photo datasets to training algorithms on quality control to field deployment, IT integration, and change management, this series of articles describes the steps you need to take to see actual results on your performance indicators quickly.
In computer vision, as in all machine learning technologies, the data driving the algorithms is at the heart of model building.
This essential phase of creating photo datasets requires a number of prerequisites to ensure that models are as close as possible to the reality on the ground and, therefore, guarantee a faster ROI.
Defining the scope of photo datasets
Firstly, the photos used to train the algorithms need to cover a variety of situations and environments encountered by field teams. Project teams, therefore, need to define:
- Which elements of the infrastructure should be in the scope of the real-time quality control project.
- The different models of equipment, as designs, can vary on the same network.
- The photos to be requested from field employees, each one focusing on a job step.
- Checkpoints: the rules and gestures to be verified on the photos. We also need to define when each checkpoint is validated (OK) and when it is invalidated (KO).
- Working environments, taking into account different lighting conditions, indoors and outdoors.

It is possible to use existing datasets, but their quality is often not guaranteed. Indeed, if you haven't defined your standards and trained your field staff to take photos according to these standards, it's likely that many of them won't be usable. What's more, they are not aligned with the new standards established when the project was set up with Deepomatic. We therefore recommend collecting data from the field to build your datasets, as machine learning requires qualitative data. This also allows you to train the technician in the correct gestures for taking photos.
Training field teams to take usable photos
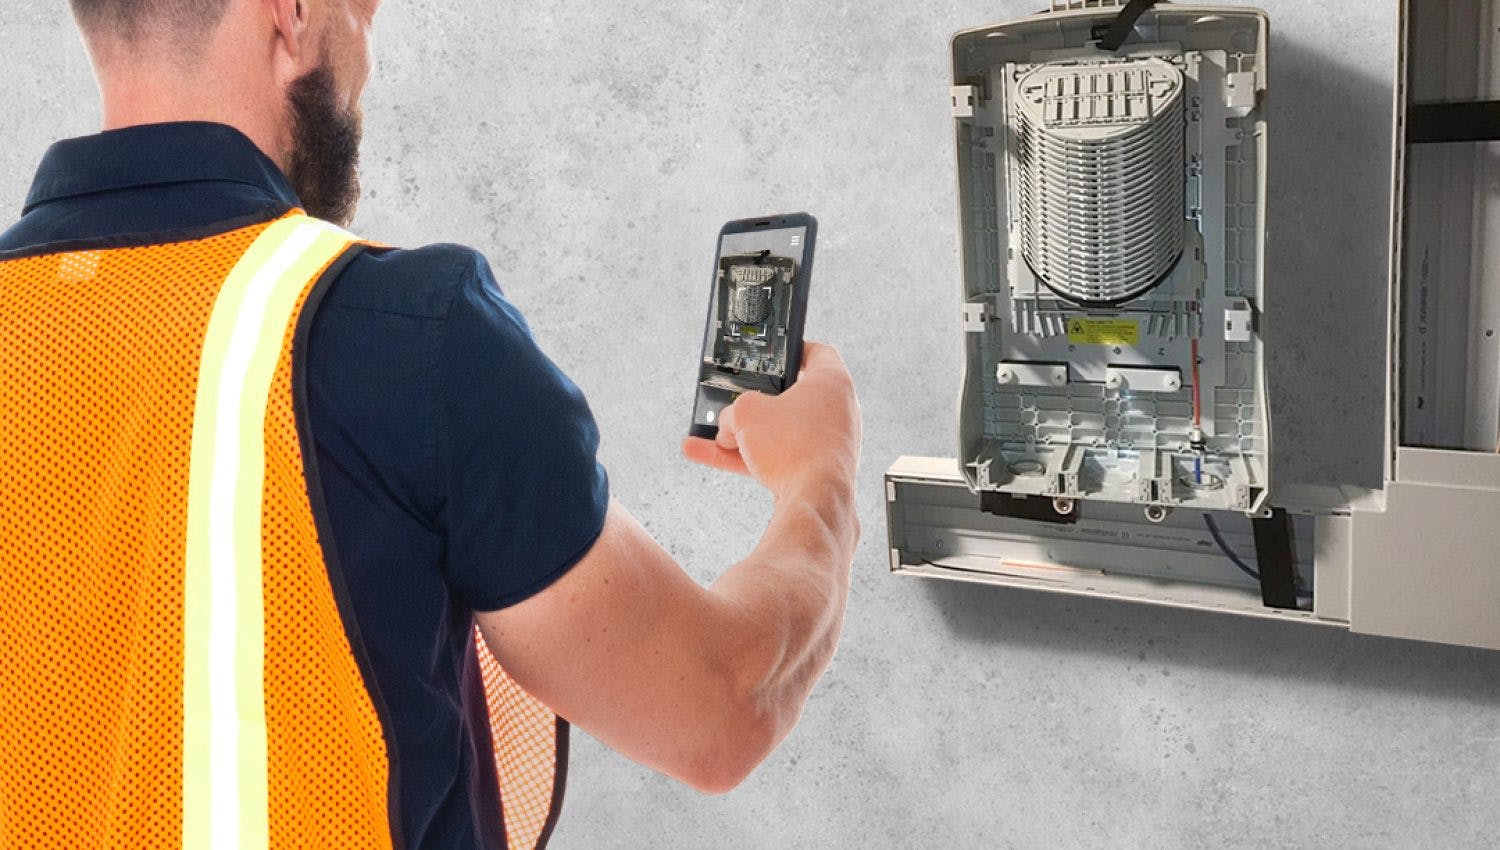
Field staff play an essential role in the creation of datasets, as their photos will be used to train the algorithms. Therefore, training them to capture well-framed, usable photos is crucial. Several methods can be implemented, such as providing an example of what is considered a good photo in their mobile application with a description of the expected gesture. This data collection phase also accustoms field teams to the use of AI and the proper documentation of operations. It makes them aware of the elements and gestures that the company wants to be able to verify in its quality control process.
Our experience at Deepomatic has shown us that imposing an automation tool on field employees is not enough to engage them. Operations managers, therefore, need to communicate the objectives of using a new tool.
Once Deepomatic's mobile application had been configured, the scope of the project defined, and the photo-taking guidelines communicated to the field teams, the system was implemented in the field. In just 30 days, it is already possible to launch the Go Live of the first phase of a computer vision project.
Automatic quality control of field photo datasets
Checking data conformity, i.e., the quality of photos, is essential to avoid feeding the system with bad data. It is therefore necessary to implement controls to guarantee the legibility and conformity of photos:
- Detection of blurred photos
- Validation of photo resolution and format (horizontal or vertical)
- Verification of brightness and contrast levels.
In addition, the solution checks that, for the same operation, the before and after photos of the equipment are different. This then enables the models used to verify the work performed by the field employee to check that the work has been carried out correctly.
Photo quality control requires no model training and can be deployed immediately.
Iterating on the initially established perimeter to guarantee the representativeness of the field
We believe that this period, during which the solution is made available to technicians, should be seen as an opportunity to question and validate the scope of the project. The principles and standards established in the office can sometimes be far removed from reality in the field. For example, the data collection phase may reveal:
- Failure to take account of certain working conditions in the field:
- Poor lighting in certain places or at certain times of the day, preventing the capture of a good photo
- Poor network coverage - Redundant photos provide information that can already be gathered from other photos
- Photo framing that makes it difficult to see the information with the naked eye.
Deepomatic's platform components enable companies to collect photos from the field, providing visibility on photo quality and adoption of the solution by field teams. Project managers can thus adjust the conditions surrounding this field data collection phase, and maximize the efficiency of their algorithms.
As we’ve seen, this is an iterative process that enables project teams to adapt continuously to the reality on the ground.
In our next article, you’ll find out how to train algorithms and build custom AI incrementally to automate quality control of field teams' work.